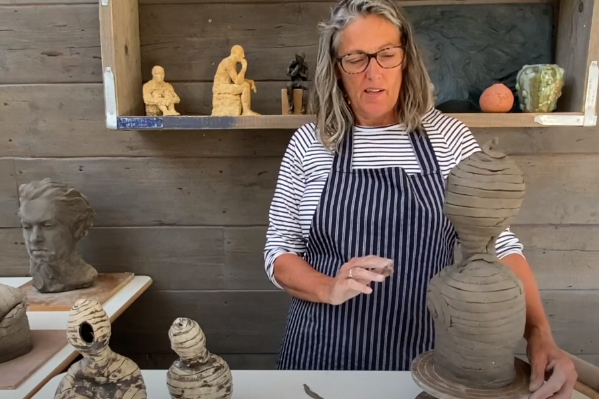
Sculpting with clay coils, also known as rope-coil pottery, is a simple yet powerful artistic technique. It allows anyone, regardless of experience, to create beautiful and unique sculptures using only their hands and some basic materials.
Table Of Contents
- 0.1 Unleashing Your Inner Artist: Why Choose Coil Sculpting?
- 0.2 Next Steps: Gathering Your Tools and Materials
- 1 Ready to Create? Unraveling the Coil Sculpting Process
- 2 Embarking on Your Artistic Journey: Tips for Beginners
- 3 Resources to Fuel Your Artistic Growth:
- 4 Books:
- 5 Essential Terms to Know:
- 6 Understanding the Terminology in Practice:
- 7 Benefits of Understanding the Terminology:
- 8 1. Conception and Inspiration:
- 9 2. Clay Preparation:
- 10 3. Coil Formation:
- 11 4. Joining the Coils:
- 12 5. Building the Form:
- 13 6. Shaping and Refining:
- 14 7. Adding Dimension and Interest:
- 15 8. Finishing Touches:
- 16 9. Drying and Curing:
- 17 10. Reflect and Celebrate!
- 18 Frequently Asked Questions:
- 19 1. What type of clay should I use?
- 20 2. What tools do I need?
- 21 3. How do I make the coils stick together?
- 22 4. How long does it take for a sculpture to dry?
- 23 5. How do I cure my sculpture?
- 24 6. How can I improve my coil sculpting skills?
- 25 7. Where can I sell my sculptures?
- 26 Additional Resources:
- 27 Books:
- 28 Online Tutorials:
- 29 YouTube Videos:
Unleashing Your Inner Artist: Why Choose Coil Sculpting?
This ancient technique is experiencing a resurgence in popularity due to its various benefits:
- Easy to Learn: No prior artistic experience is required. Rolling and attaching coils is a straightforward process that anyone can master with a little practice.
- Forgiving Material: Clay is incredibly forgiving. If you make a mistake, simply reshape or smooth it out. No need to start over.
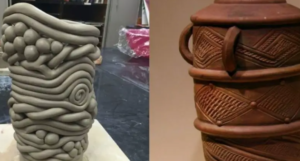
- Versatility Unbound: Coils allow you to create a vast array of shapes and textures. From smooth, flowing curves to sharp, angular lines, the possibilities are endless.
- Affordable Creativity: Clay is a relatively inexpensive material compared to other sculpting mediums, making it accessible to everyone.
Next Steps: Gathering Your Tools and Materials
To embark on your coil sculpting journey, you’ll need a few basic materials and tools:
Clay: opts for air-dry clay if you’re a beginner. It’s easy to use and doesn’t require baking. Polymer clay is another option, offering longer working time and greater durability.
Rolling Pin: This helps roll the clay into smooth, even coils.
Sculpture Tools: A few essential tools like a loop tool, sculpting knife, and water-filled container are helpful for shaping and smoothing the clay.
Work Surface: Choose a clean, flat surface like cardboard or plywood for a comfortable sculpting experience.
Ready to Create? Unraveling the Coil Sculpting Process
Now that you’re prepared, let’s explore the basic steps of sculpting with clay coils:
-
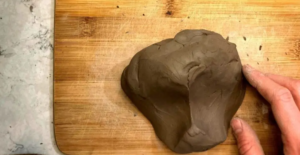
Clay Preparation: Knead the clay until soft and pliable.
-
Coil Formation: Roll the clay into long, even ropes. Experiment with different thicknesses for added texture and dimension.
-
Coil Joining: Attach the coils to each other using a small amount of slip (clay mixed with water). Press firmly to ensure a secure bond.
-
Forming the Sculpture: Build up the desired shape by adding and manipulating the coils. Don’t be afraid to experiment and let your creativity guide you.
-
Smoothing and Finishing: Use your tools to smooth out the surface of your sculpture and add any finishing touches.
Embarking on Your Artistic Journey: Tips for Beginners
Here are some helpful tips to maximize your coil sculpting experience:
- Start simple: Begin with a basic design to familiarize yourself with the technique before tackling more complex projects.
- Embrace the Experimentation: Don’t be afraid to try different coil sizes, textures, and shapes. This is the best way to learn and discover your artistic vision.
- Mistakes are Welcome: Remember, clay is forgiving. Don’t be discouraged by mistakes; simply adjust and continue sculpting.
- Enjoy the Process: Most importantly, have fun! Coil sculpting is a relaxing and rewarding activity that allows you to express your creativity and create something truly unique.
Resources to Fuel Your Artistic Growth:
To further explore the world of coil sculpting, here are some valuable resources:
Books:
- The Complete Book of Polymer Clay by Lisa Pavelka
- Ceramic Arts Daily: The Best of Coil Building by the editors of Ceramic Arts Daily
Online Tutorials: Numerous websites and platforms offer free and paid tutorials on coil sculpting.
YouTube Videos: Find instructional videos demonstrating the basic techniques of coil sculpting.
Start your sculpting adventure today and discover the joy of creating with clay coils!

Session 2: Delving Deeper into Coil Sculpting: Unraveling the Terminology
In the previous session, we explored the exciting world of coil sculpting for beginners. We discussed the benefits, materials, and basic steps involved in this simple yet powerful technique.
Now, let’s delve deeper and unravel the terminology associated with coil sculpting. This will enhance your understanding and equip you to navigate the artistic landscape with confidence.
Essential Terms to Know:
- Coil: A long, rope-like piece of clay used to build the sculpture.
- Slip: A mixture of clay and water used as an adhesive to join coils together.
- Scoring: The process of roughening the surface of the clay to ensure a stronger bond between coils.
- Smoothing: The process of eliminating any unwanted bumps or imperfections on the surface of the clay.
- Burnishing: Polishing the clay to create a smooth, shiny surface.
- Texture: The surface quality of the clay, which can be smooth, rough, bumpy, or patterned.
- Armature: A wire frame that provides support and structure for the sculpture.
- Undercut: A design element where the clay overhangs itself, requiring additional support.
Understanding the Terminology in Practice:
Let’s illustrate the application of these terms in a typical coil sculpting scenario. Imagine you’re creating a small animal sculpture. You’d roll out coils for the body, legs, and head. Using slip, you’d meticulously attach these coils to build the desired form. You might then use a tool to score the areas where the coils join for a stronger bond. Smoothing and burnishing would give your sculpture a polished finish. Adding texture could further enhance its visual appeal. If your animal has features like ears or a tail that extend outwards, you might use an armature for additional support. Understanding the term “undercut” would be crucial if your animal has features like curled horns or a tucked-in tail, as these require extra support to maintain their shape.
Benefits of Understanding the Terminology:
Knowing the terminology has several advantages:
- Improved Communication: It allows you to communicate effectively with other artists, instructors, and art suppliers.
- Enhanced Learning: It facilitates comprehension of tutorials, books, and other resources on coil sculpting.
- Greater Confidence: It empowers you to navigate the artistic world and discuss your work with knowledge and clarity.
- Unlocking Creativity: It opens doors to new techniques and challenges, propelling your artistic journey forward.
By expanding your understanding of the terminology, you transform from a curious beginner into a confident sculptor. You gain the tools to communicate effectively, explore new ideas, and push the boundaries of your artistic expression.
In the next session, we’ll delve deeper into the practical aspects of coil sculpting, guiding you through the process step-by-step and equipping you with the knowledge to create your own stunning sculptures.

Session 3: Shaping Your Creativity: A Step-by-Step Guide to Coil Sculpting
Now that you’re familiar with the basic terminology of coil sculpting, it’s time to roll up your sleeves and delve into the hands-on experience! In this session, we’ll embark on a step-by-step journey, guiding you through the process of creating your very own clay coil sculpture.
1. Conception and Inspiration:
Before diving into the clay, take some time to visualize your desired outcome. Sketch out ideas, gather inspiration from nature or art books, or browse online galleries for coil sculptures that resonate with you. This initial planning phase will shape the direction of your creative journey.
2. Clay Preparation:
Knead your chosen clay thoroughly until it becomes soft and pliable. This ensures a smooth and enjoyable sculpting experience. You might want to dampen your hands slightly to prevent the clay from sticking.
3. Coil Formation:
Using a rolling pin, roll out the clay into even, long ropes. Experiment with different thicknesses to add variation and texture to your sculpture.
4. Joining the Coils:
Apply a small amount of slip (clay mixed with water) to the edges of the coils. This acts as an adhesive, allowing you to seamlessly join them together. Gently press the coils together, ensuring a secure bond.
5. Building the Form:
Gradually build the desired shape by adding and manipulating the coils. Start with larger coils for the main body of your sculpture and use smaller ones for details and intricate features.
6. Shaping and Refining:
Once the basic form is established, it’s time for refinement. Use your hands and sculpting tools to smooth out imperfections, define details, and add texture. Experiment with different tools and techniques to achieve the desired effect.
7. Adding Dimension and Interest:
Consider incorporating additional elements like found objects, stamps, or textures to enhance the visual impact of your sculpture. This adds depth and intrigue, making your creation truly unique.
8. Finishing Touches:
After you’re satisfied with the form and details, it’s time for the final touches. You can choose to burnish the clay for a polished finish or leave it with a natural texture. Some artists choose to paint their sculptures to add color and further enhance their artistic vision.
9. Drying and Curing:
Let your sculpture dry completely before handling it. Depending on the size and thickness of your creation, this could take several days to a week. Once dry, you can cure the clay according to the manufacturer’s instructions. This will further strengthen and preserve your sculpture.
10. Reflect and Celebrate!
Take a moment to admire your creation! Reflect on the creative process, the challenges you faced, and the joy of transforming clay into something unique and beautiful. Celebrate your success and remember, every finished sculpture is a testament to your artistic journey.
Remember, there’s no right or wrong way to sculpt with clay coils. Embrace the freedom to experiment, explore, and allow your creativity to guide you.
In the next session, we’ll delve into frequently asked questions and additional resources to help you further refine your coil sculpting skills and embark on exciting new artistic ventures.
Session 4: Embracing the Artistic Journey: FAQs and Resources for Coil Sculptors
As we conclude our exploration of coil sculpting, let’s address frequently asked questions and offer valuable resources to empower you on your artistic journey.
Frequently Asked Questions:
1. What type of clay should I use?
For beginners, air-dry clay is a good option due to its ease of use and affordability. Polymer clay offers greater durability and requires baking, making it suitable for more intricate projects.
2. What tools do I need?
A basic toolkit includes a rolling pin, loop tool, sculpting knife, and water-filled container. You can expand your collection as you explore different techniques.
3. How do I make the coils stick together?
Use slip, a mixture of clay and water, as an adhesive to join the coils. Score the surfaces before applying slip for a stronger bond.
4. How long does it take for a sculpture to dry?
Drying time depends on the size and thickness of your sculpture. It can take several days to a week for a complete dry.
5. How do I cure my sculpture?
Follow the manufacturer’s instructions for curing your chosen clay type. This strengthens the sculpture and makes it more durable.
6. How can I improve my coil sculpting skills?
Practice regularly, experiment with different techniques, and seek inspiration from other artists. Numerous online resources and tutorials can also guide your learning.
7. Where can I sell my sculptures?
Online platforms like Etsy and Attainder offer opportunities to sell your creations. You can also participate in art fairs, local events, or create your own online store.
Additional Resources:
Books:
- The Complete Book of Polymer Clay by Lisa Pavelka
- Ceramic Arts Daily: The Best of Coil Building by the editors of Ceramic Arts Daily
Online Tutorials:
- Sculpting a Simple Vase with Clay Coils by Creative bug
- Coil Building Basics with 15 Decorative Coil Techniques! by The Pottery Whisperer
YouTube Videos:
- Beginner Coil Building Sculpture for Beginners by Pottery With Me
- How to Build an Abstract Figure Using Coil-Building Technique by The Ceramic Studio
Remember, coil sculpting is a journey of continuous learning and discovery. Embrace the challenges, enjoy the process, and let your creativity guide you as you transform clay into captivating sculptures that speak volumes without words. May your artistic journey be filled with inspiration, discovery, and the satisfaction of leaving a lasting legacy through your art.

1 thought on “Sculpting With Clay Coils For Beginners”