Table Of Contents
- 1 Unlocking Artistic Freedom: The Best Clay for Sculpting Without a Kiln
- 1.1 Unveiling the Advantages of Air-Dry Clay:
- 1.2 Demystifying Air-Dry Clay: Exploring a Spectrum of Creative Options
- 1.3 1. Self-Hardening Clay:
- 1.4 2. Paper Clay:
- 1.5 3. Stone-Art Clay:
- 1.6 4. Sculpting Paste:
- 1.7 5. Cold Porcelain:
- 1.8 6. Natural Clays:
- 1.9 7. Air-Dry Polymer Clay:
- 1.10 Shaping Your Artistic Journey: Tips and Techniques for Air-Dry Clay Sculpting
- 1.11 1. Preparation and Tools:
- 1.12 2. Sculpting Techniques:
- 1.13 3. Air-Drying and Finishing:
- 1.14 4. Additional Tips:
- 1.15 Sculpting Conclusions and Air-Dry Clay FAQs
- 1.16 Key Takeaways:
- 1.17 Frequently Asked Questions:
Unlocking Artistic Freedom: The Best Clay for Sculpting Without a Kiln
The allure of clay sculpting lies in its inherent versatility and accessibility. But what if you lack access to a kiln, the essential tool for firing traditional ceramic clays? Fear not! A vast array of air-dry clays exists, offering a convenient and kiln-free way to unleash your creative potential.
Unveiling the Advantages of Air-Dry Clay:
Air-dry clay, as its name suggests, hardens naturally at room temperature, eliminating the need for a kiln. This makes it ideal for both beginners and seasoned sculptors alike, offering several key advantages:
1. Convenience: No kiln means no waiting for preheating or cooling down. You can sculpt whenever inspiration strikes, regardless of access to specialized equipment.
2. Portability: Air-dry clay is lightweight and easy to transport, making it ideal for working outdoors or in small spaces.
3. Safety: Unlike some fired clays, air-dry clays are generally non-toxic and safe for artists of all ages, making them perfect for family-friendly projects.
4. Versatility: Air-dry clays come in various colors and textures, allowing you to experiment and create diverse artistic expressions.
5. Affordability: Compared to other sculpting materials, air-dry clay is relatively inexpensive, making it a budget-friendly choice for artists.
With its undeniable advantages, air-dry clay has become a popular choice for a wide range of sculpting projects, from delicate figurines and intricate jewelry to decorative homeware and functional pottery.
In the next, we’ll delve deeper into the different types of air-dry clay available, exploring their unique properties and ideal applications.
Demystifying Air-Dry Clay: Exploring a Spectrum of Creative Options
While the term “air-dry clay” encompasses a versatile range of sculpting materials, each boasts its own distinct characteristics and applications. Understanding these nuances will empower you to choose the perfect air-dry clay for your specific project and artistic vision.
1. Self-Hardening Clay:
This widely available and affordable clay is ideal for beginners due to its user-friendliness and forgiving nature. It readily accepts shaping and remains workable for an extended period, allowing for ample time to refine your creation.
2. Paper Clay:
Lightweight and surprisingly strong, paper clay is an excellent choice for large sculptures or delicate pieces requiring intricate details. Its paper fiber content prevents cracking and shrinkage during drying, making it a reliable option for complex projects.
3. Stone-Art Clay:
Offering a natural stone-like appearance after drying, this clay is perfect for creating realistic sculptures or mimicking the texture of natural rock formations. It readily accepts paints and other embellishments, allowing for further artistic customization.
4. Sculpting Paste:
This thick, creamy clay is ideal for building texture and adding dimensional elements to existing sculptures or creating free-standing forms with bold, expressive qualities.
5. Cold Porcelain:
This air-dry clay boasts a smooth, porcelain-like finish when dry, making it a popular choice for creating delicate figurines, jewelry, and other decorative pieces. It requires slightly more care and attention while sculpting due to its fast drying time, making it better suited for experienced artists.
6. Natural Clays:
Offering a more authentic and earthy feel, natural clays like earthenware and kaolin can be air-dried with careful handling. However, they may require additional techniques to prevent cracking and shrinkage, making them a more advanced option.
7. Air-Dry Polymer Clay:
Bridging the gap between traditional polymer and air-dry clays, this unique material combines the air-drying convenience with the versatility and durability of polymer clay. It can be sculpted, baked, or air-dried, offering greater creative flexibility.
By exploring the diverse range of air-dry clays available, you can discover the perfect material to bring your creative vision to life.
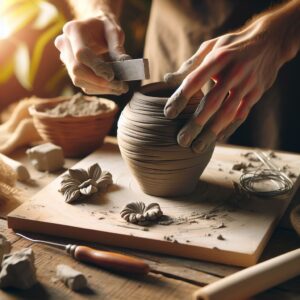
Shaping Your Artistic Journey: Tips and Techniques for Air-Dry Clay Sculpting
With a comprehensive understanding of the different air-dry clay options, it’s time to delve into the practical aspects of sculpting. Here are some valuable tips and techniques to help you master the art of air-dry clay sculpting:
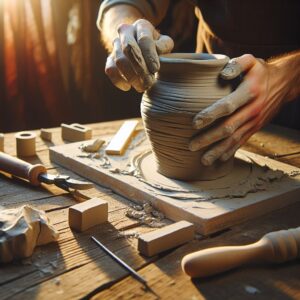
1. Preparation and Tools:
- Work surface: Choose a clean, flat surface with enough space for your project. A cutting mat or craft board is ideal.
- Sculpting tools: Invest in basic tools like sculpting knives, spatulas, and loop tools for shaping and adding details.
- Water and brushes: Water helps keep the clay moist and workable. Brushes are useful for smoothing surfaces and applying slip.
- Rolling pin: A rolling pin helps roll out clay evenly for creating flat forms and intricate details.
- Texture tools: Experiment with various tools like combs, stamps, and textured rollers to add visual interest and depth to your sculptures.
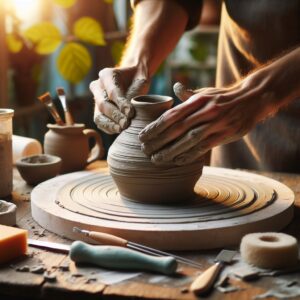
2. Sculpting Techniques:
- Pinch method: This beginner-friendly technique involves pinching and manipulating the clay to create simple shapes like spheres, cones, and cylinders.
- Coil method: Build intricate shapes and structures by rolling clay into coils and joining them together with slip.
- Slab construction: Roll out clay slabs to create flat pieces that can be cut, shaped, and assembled to form various objects.
- Adding texture: Experiment with different tools and techniques to add texture to your sculptures, enhancing the visual interest and storytelling potential of your artwork.
3. Air-Drying and Finishing:
- Drying time: Air-drying times vary depending on the clay type and the size of your project. Allow for sufficient drying time to prevent cracking or warping.
- Sanding and smoothing: Once dry, use fine-grit sandpaper to smooth any rough edges or imperfections.
- Painting and finishing: Unleash your creativity by adding colorful accents and details with paints, markers, and other embellishments.
- Sealing (optional): Applying a sealant can help protect your finished air-dry clay sculpture from dust, moisture, and fading.
4. Additional Tips:
- Start small and gradually work on more complex projects as you gain experience.
- Practice regularly to improve your skills and explore different techniques.
- Don’t be afraid to experiment and make mistakes.
- Seek inspiration from other artists and online resources.
- Most importantly, have fun and enjoy the creative process!
By following these tips and techniques, you can successfully navigate the world of air-dry clay sculpting and create unique and beautiful pieces of art.
Sculpting Conclusions and Air-Dry Clay FAQs
As we conclude our exploration of air-dry clay sculpting, let’s solidify your understanding with key takeaways and address frequently asked questions to empower you to confidently embark on your artistic journey.
Key Takeaways:
- Air-dry clay offers a convenient, portable, safe, and versatile alternative to traditional sculpting clays, requiring no kiln for hardening.
- Various air-dry clay types exist, each with unique properties and ideal applications, including self-hardening clay, paper clay, stone-art clay, sculpting paste, cold porcelain, natural clays, and air-dry polymer clay.
- Mastering fundamental techniques like the pinch method, coil method, and slab construction will empower you to create diverse sculptures.
- Proper preparation with essential tools, understanding air-drying times, and finishing techniques like sanding, painting, and sealing are crucial for successful air-dry clay sculpting.
Frequently Asked Questions:
1. How long does air-dry clay take to dry?
Drying time varies depending on the clay type, project size, and humidity levels. Generally, expect 24-48 hours for small projects and longer for larger pieces.
2. How can I prevent air-dry clay from cracking?
- Ensure the clay is evenly moist while sculpting.
- Avoid sculpting overly thin pieces.
- Dry your sculptures gradually in a well-ventilated area.
- Consider applying a sealant after drying.
3. What paints can I use on air-dry clay?
Acrylic paints are the most popular choice for air-dry clay due to their versatility and ease of use. Other options include tempera, gouache, and even spray paint.
4. Can I bake air-dry clay?
While some air-dry clay types can withstand low-temperature baking, it’s generally not recommended as it can cause cracking or warping.
5. Where can I find air-dry clay?
Air-dry clay is widely available at craft stores, art supply stores, and online retailers.
Embarking on the journey of air-dry clay sculpting unlocks a world of creative expression and artistic fulfillment. Remember, the key is to explore, experiment, and most importantly, have fun!