Table Of Contents
- 1 Unlocking the Secrets of Clay Sculpting Tools
- 1.1 A Foundation for Creativity:
- 1.2 Deciphering the Language of Clay Sculpting Tools
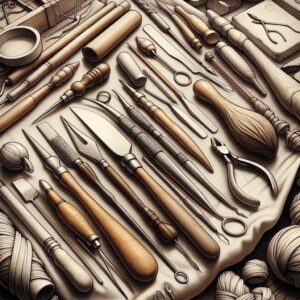
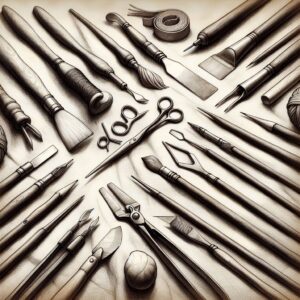
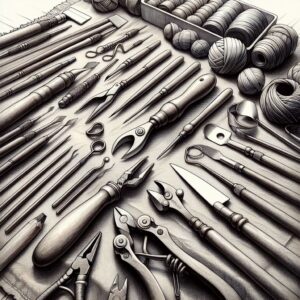
- 1.3 Essential Clay Sculpting Tools and Their Names:
- 1.4 Understanding the Significance of Names:
- 1.5 Unveiling the Functions and Applications of Clay Sculpting Tools
- 1.6 Boxwood Tools:
- 1.7 Loop and Ribbon Tools:
- 1.8 Ribs and Scrapers:
- 1.9 Needle Tools:
- 1.10 Sponges:
- 1.11 Shapers:
- 1.12 Sgraffito Tools:
- 1.13 Embracing the Art of Clay Sculpting: Takeaways and FAQs
- 1.14 Key Takeaways:
- 1.15 Frequently Asked Questions:
- 1.15.1 1. What are the most essential tools for a beginner clay sculptor?
- 1.15.2 2. What type of clay works best for beginners?
- 1.15.3 3. How do I care for my clay sculpting tools?
- 1.15.4 4. Where can I find resources for learning more about clay sculpting?
- 1.15.5 5. What are some tips for successful clay sculpting?
Unlocking the Secrets of Clay Sculpting Tools
The world of clay sculpting offers a captivating and rewarding pursuit, allowing you to translate your imagination into tangible three-dimensional art. However, embarking on this creative journey requires not just vision and passion, but also the right tools to guide your artistic expression. In this blog series, we delve into the fascinating realm of clay sculpting tools, unveiling their names, functions, and significance for aspiring artists.
A Foundation for Creativity:
Clay sculpting tools are more than just instruments; they are extensions of your artistic vision. They provide the means to shape, refine, and personalize your clay sculptures, transforming a formless mass into a masterpiece. By familiarizing yourself with the names and functions of these tools, you unlock a world of creative possibilities and pave the way for realizing your artistic ambitions.
Now next, we will embark on a journey of discovery, defining the key terms and delving into the meaning behind the names of essential clay sculpting tools.
Deciphering the Language of Clay Sculpting Tools
As we continue our exploration of clay sculpting tools, let’s unravel the mysteries behind their names and delve into the meaning behind each term. Understanding the purpose and function of these tools is crucial for mastering the art of clay sculpting and translating your creative vision into reality.
Essential Clay Sculpting Tools and Their Names:
- Boxwood Tools: These versatile tools, often crafted from the wood of the boxwood tree, come in a variety of shapes and sizes, ideal for shaping, smoothing, and carving details.
- Loop and Ribbon Tools: These wire-shaped tools with loops or ribbon-like ends are perfect for creating delicate details, adding texture, and defining curves.
- Ribs and Scrapers: These flat, smooth tools are used for shaping large areas of clay, smoothing out surfaces, and removing excess material.
- Needle Tools: These sharp, pointed tools come in various sizes and shapes, allowing for precise detail work, scoring lines, and creating intricate patterns.
- Sponges: These absorbent tools are essential for smoothing clay surfaces, blending edges, and applying water for a smoother sculpting experience.
- Shapers: These specialized tools come in various forms, often with textured surfaces, designed to add specific textures and patterns to your sculptures.
- Sgraffito Tools: These sharp tools are used to scratch and carve into the surface of the clay, creating decorative designs and patterns.
Understanding the Significance of Names:
Each tool name reflects its function and purpose. For instance, “boxwood tools” derive their name from the wood traditionally used for their construction, while “loop and ribbon tools” describe their distinctive shapes. Recognizing these connections helps you connect the tool’s name to its application, enhancing your understanding and facilitating their effective use.
By immersing yourself in the language of clay sculpting tools, you gain access to a deeper understanding of their purpose and potential. This knowledge empowers you to make informed choices and unlock the full creative potential of these invaluable tools.
Now next, we will take a closer look at the specific functions and applications of each tool, guiding you on your journey of mastering the art of clay sculpting.
Unveiling the Functions and Applications of Clay Sculpting Tools
Equipped with the knowledge of key tool names and their meanings, we now delve into the fascinating world of their practical applications. Understanding how to use each tool effectively empowers you to transform your creative vision into reality.
Boxwood Tools:
- Modeling tools: These rounded and pointed tools are ideal for shaping basic forms, smoothing surfaces, and creating indentations.
- Carving tools: These tools feature sharp edges and various shapes, perfect for carving details, refining features, and adding texture.
- Scoring tools: These tools have serrated edges and are used to create texture, score lines for joining clay pieces, and roughen surfaces for better adhesion.
Loop and Ribbon Tools:
- Loop tools: These wire-shaped tools with loops at the end are perfect for creating delicate details like eyes, noses, and mouths, adding texture, and defining curves.
- Ribbon tools: These tools have flat, ribbon-like ends and are used for creating smooth edges, blending seams, and shaping curved surfaces.
Ribs and Scrapers:
- Ribs: These flat, smooth tools come in various sizes and are used for shaping large areas of clay, smoothing out surfaces, and removing excess material.
- Scrapers: These tools have sharp edges and are used for cutting through clay, removing unwanted material, and shaping flat surfaces.
Needle Tools:
- Pointed needle tools: These are used for creating small holes, scoring lines, and adding precise details.
- Ball-ended needle tools: These are used for smoothing surfaces, blending edges, and creating rounded indentations.
Sponges:
- Natural sponges: These are used for adding water to the clay and smoothing surfaces.
- Synthetic sponges: These are used for applying slip (a liquid clay mixture) to join clay pieces and for cleaning tools.
Shapers:
- Textured rollers: These are used for adding various textures to the clay surface, like wood grain, fabric patterns, and animal fur.
- Combs: These are used for creating grooves, ridges, and other decorative patterns.
- Stamps: These are used to impress pre-designed patterns and textures onto the clay surface.
Sgraffito Tools:
- Metal tools: These come in various shapes and sizes and are used for scratching and carving into the surface of the clay, creating decorative designs and patterns.
- Wooden tools: These are used for carving softer clays and creating wider grooves and patterns.
By mastering the functions and applications of these essential clay sculpting tools, you unlock a world of creative possibilities. Experimenting with different tools and techniques will allow you to express your artistic vision and bring your unique sculptures to life.
Now next, we will consolidate your understanding with key takeaways and answer frequently asked questions to ensure you embark on your clay sculpting journey with confidence.
Embracing the Art of Clay Sculpting: Takeaways and FAQs
As we conclude our exploration of clay sculpting tools, let’s solidify your understanding with key takeaways and address frequently asked questions to empower you to confidently embark on this rewarding artistic pursuit.
Key Takeaways:
- Clay sculpting tools are essential extensions of your artistic vision, enabling you to shape, refine, and personalize your clay sculptures.
- Understanding the names, functions, and applications of these tools equips you with the necessary knowledge and skills to translate your creative ideas into tangible reality.
- Each tool name reflects its purpose, fostering a deeper connection between the tool and its application.
- Mastering the use of various tools, including boxwood tools, loop and ribbon tools, ribs and scrapers, needle tools, sponges, shapers, and sgraffito tools, opens doors to boundless creative possibilities.
- Experimentation and practice are key to unlocking your artistic potential and expressing your unique vision through clay sculpture.
Frequently Asked Questions:
1. What are the most essential tools for a beginner clay sculptor?
A starter kit typically includes basic tools like modeling tools, loop tools, ribs, sponges, and a needle tool. This provides a good foundation for exploring various techniques and developing your skills.
2. What type of clay works best for beginners?
Air-dry clay or polymer clay are suitable choices for beginners. Air-dry clay is affordable and readily available, while polymer clay offers greater durability and allows for baking to harden.
3. How do I care for my clay sculpting tools?
Clean your tools thoroughly after each use with water and a mild soap. Wipe them dry and store them in a clean, dry place to prevent rust and damage.
4. Where can I find resources for learning more about clay sculpting?
Numerous online tutorials, books, and workshops offer valuable guidance and inspiration for clay sculpting. Consider joining online communities to connect with other artists and share your experiences.
5. What are some tips for successful clay sculpting?
- Start with simple projects and gradually progress to more complex designs.
- Work in small sections to maintain control and precision.
- Use reference materials like photographs or live models to improve accuracy and likeness.
- Practice regularly and experiment with different techniques to develop your skills.
- Most importantly, have fun and enjoy the creative process!
By embracing the knowledge and skills gained through this exploration of clay sculpting tools, you are now equipped to embark on your own captivating journey of artistic expression. Remember, the world of clay sculpting awaits, filled with endless possibilities and opportunities to unleash your creativity and bring your artistic vision to life.