Table Of Contents
- 1 Creating Molds for Clay Casting: Replicating Your Artistic Vision
- 1.1 From Original to Replica: Unveiling the Mold Making Process
- 1.2 1. Choosing Your Mold Material:
- 1.3 2. Prepping Your Clay Sculpture:
- 1.4 3. Building the Mold:
- 1.5 4. Casting Your Vision:
- 1.6 5. Demolding and Finishing Touches:
- 1.7 Beyond Replication: Exploring the Significance of Mold Making for Clay Casting
- 1.8 1. Amplify Artistic Expression:
- 1.9 2. Bridge the Gap Between Art and Commerce:
- 1.10 3. Expand Creative Horizons:
- 1.11 4. Democratize Art Ownership:
- 1.12 5. Preserve Artistic Legacy:
- 1.13 From Vision to Reality: A Comprehensive Guide to Creating Molds for Clay Casting
- 1.14 Gathering Your Toolkit:
- 1.15 Building the Mold: A Step-by-Step Guide:
- 1.16 Preparing for Casting:
- 1.17 The Casting Process:
- 1.18 Mold Making for Clay Casting: Conclusion, FAQs, and Resources
- 1.19 Key Takeaways:
- 1.20 Frequently Asked Questions (FAQs):
- 1.21 Q: Which mold material is best for beginners?
- 1.22 Q: How do I prevent air bubbles in my casting?
- 1.23 Q: What are some alternative casting materials I can use?
- 1.24 Additional Resources:
- 1.25 Books:
- 1.26 Online tutorials and courses:
- 1.27 YouTube channels:
Creating Molds for Clay Casting: Replicating Your Artistic Vision
Have you ever poured your heart and soul into creating a beautiful clay sculpture, only to wish you could share it with the world? Creating molds for clay casting offers a thrilling solution, enabling you to replicate your artistic vision and produce multiple copies of your masterpiece. This captivating technique empowers artists to extend the reach of their art, share their creativity with others, and even explore the possibilities of commercialization.
In this introductory session, we delve into the fascinating world of mold making for clay casting. We’ll explore the key concepts, benefits, and diverse applications of this technique, providing you with a foundational understanding of the process and piquing your interest in further exploration.
From Original to Replica: Unveiling the Mold Making Process
Creating molds for clay casting involves a series of meticulous steps, each requiring careful planning and precise execution. Here’s a glimpse into the magic behind this transformative process:
1. Choosing Your Mold Material:
Different mold materials offer distinct advantages and disadvantages. Popular choices include:
- Plaster: Affordable and readily available, but brittle and prone to cracking.
- Silicone: Flexible and durable, allowing for intricate details and undercuts.
- Latex: Highly flexible and easy to use, but less durable than silicone.
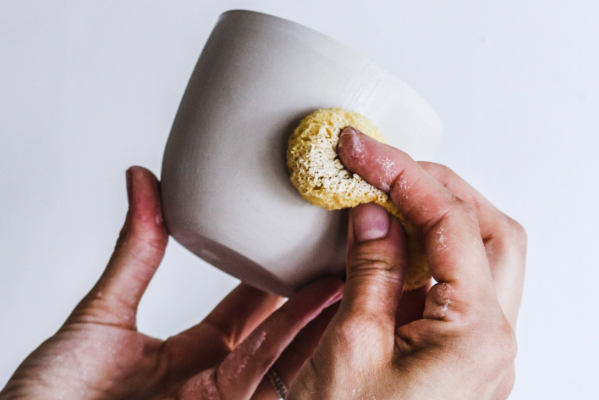
2. Prepping Your Clay Sculpture:
Ensure your masterpiece is clean, dry, and free of imperfections. Apply a mold release agent to prevent sticking and allow for easy mold removal.
3. Building the Mold:
The specific technique will depend on your chosen mold material. Generally, this involves applying the material in layers around the sculpture, creating a negative impression of its form.
4. Casting Your Vision:
Once the mold has cured, prepare your casting material, such as slip clay, resin, or liquid plastic. Carefully pour the material into the mold, capturing every detail of your original sculpture.
5. Demolding and Finishing Touches:
After the casting material has cured, gently remove it from the mold. Depending on the material, you may need to apply finishing touches like sanding, painting, or glazing to enhance the final piece.
In the next session, we’ll delve deeper into the significance of mold making for clay casting, exploring its impact on artistic expression, commercialization, and creative exploration.
Beyond Replication: Exploring the Significance of Mold Making for Clay Casting
In the previous session, we unveiled the intriguing process of creating molds for clay casting. Now, we embark on a deeper exploration, uncovering the profound significance of this technique beyond its technical aspects.
Mold making transcends the mere replication of sculptures. It empowers artists to:
1. Amplify Artistic Expression:
By creating multiple copies, artists can share their work with a wider audience, increasing the visibility and impact of their artistic vision. This allows them to connect with a larger community of art enthusiasts and collectors, fostering appreciation and dialogue around their creations.
2. Bridge the Gap Between Art and Commerce:
Mold making opens doors to commercialization opportunities. Artists can produce and sell multiples of their work, generating income and establishing a sustainable artistic career. This empowers them to pursue their passion while achieving financial independence.
3. Expand Creative Horizons:
Mold making offers a platform for experimentation and innovation. Artists can explore different casting materials, colors, and finishes, creating unique variations of their original sculpture. This fosters creative growth and allows them to push the boundaries of their artistic expression.
4. Democratize Art Ownership:
By producing multiple copies, artists can make their work more accessible to a broader audience. This allows art enthusiasts and collectors to acquire pieces at more affordable prices, democratizing art ownership and fostering a wider appreciation for fine art.
5. Preserve Artistic Legacy:
Mold making offers a way to safeguard artistic legacies. By creating lasting impressions of original sculptures, artists can ensure their work endures for generations to come. This invaluable legacy can be passed down, treasured, and admired by future audiences.
Mold making for clay casting emerges as a powerful tool in the hands of artists. It transcends the act of replication, becoming a catalyst for artistic expression, commercialization, creative exploration, and the preservation of artistic legacies. In the next session, we’ll delve into the practical aspects of mold making, providing you with a comprehensive guide to bring your own artistic visions to life.

From Vision to Reality: A Comprehensive Guide to Creating Molds for Clay Casting
Having explored the profound significance of mold making for clay casting, we now embark on the practical journey of transforming your artistic vision into tangible reality. This session equips you with the necessary knowledge and techniques to navigate the process, empowering you to create molds that capture every detail of your original clay sculpture.
Gathering Your Toolkit:
- Mold Materials: Select the appropriate mold material based on your desired properties, such as flexibility, durability, and cost. Popular choices include plaster, silicone, and latex.
- Mold Release Agent: This crucial substance prevents the mold material from adhering to your clay sculpture, ensuring its smooth removal.
- Mixing Containers and Tools: Prepare containers for mixing the mold material and various tools like spatulas, brushes, and sculpting knives for applying and manipulating the material.
- Casting Materials: Choose the casting material that aligns with your desired final product. Slip clay, resin, and liquid plastic are common options, each offering distinct qualities and finishes.
Building the Mold: A Step-by-Step Guide:
1. Sculptural Preparation: Ensure your clay sculpture is clean, dry, and free of imperfections. Apply a generous layer of mold release agent to all surfaces.
2. Constructing a Containment Frame: Build a supporting frame around your sculpture using materials like wood or cardboard. This frame will contain the mold material and ensure its proper shape.
3. Applying the Mold Material: Following the manufacturer’s instructions, mix your chosen mold material. Begin by applying a thin layer to capture all the fine details of your sculpture. Gradually build up additional layers, ensuring complete coverage and structural integrity.
4. Curing the Mold: Allow the mold material to cure according to the recommended time frame. This can range from several hours to several days, depending on the chosen material.
5. Mold Removal and Finishing Touches: Once cured, carefully remove the mold from your clay sculpture. Inspect for any imperfections and address them if necessary. You can also apply a finishing coat to the mold’s interior for smoother casting results.
Preparing for Casting:
- Clean and Re-apply Release Agent: Clean the interior of the mold and re-apply a thin layer of mold release agent before each casting process.
- Prepare Your Casting Material: Mix your chosen casting material according to the manufacturer’s instructions. Ensure it is well-mixed and free of air bubbles.
The Casting Process:
- Pouring the Material: Slowly and carefully pour the casting material into the mold, taking care to avoid air bubbles. Fill the mold completely and allow the material to cure according to its recommended time frame.
- Demolding and Finishing: Once cured, gently remove the casting from the mold. Depending on the material, you may need to perform additional finishing touches like sanding, painting, or glazing to achieve your desired final appearance.
By diligently following these steps and utilizing the appropriate materials and tools, you can create high-quality molds for clay casting, allowing you to replicate your artistic vision and share it with the world.
In the final session, we’ll address frequently asked questions and provide additional resources to empower you on your journey with mold making for clay casting.
Mold Making for Clay Casting: Conclusion, FAQs, and Resources
Having embarked on a captivating exploration of mold making for clay casting, we now reach the culmination of our journey. This final session consolidates key takeaways, addresses frequently asked questions, and provides valuable resources to support your continued pursuit of this rewarding artistic practice.
Key Takeaways:
- Creating molds for clay casting allows artists to reproduce their original clay sculptures, amplifying artistic expression, exploring commercial possibilities, and preserving artistic legacies.
- Different mold materials like plaster, silicone, and latex offer distinct advantages and disadvantages, requiring careful selection based on your desired properties and project specifics.
- The mold making process involves sculpting preparation, constructing a containment frame, applying the mold material, curing, mold removal, and finishing touches.
- Casting involves preparing the casting material, pouring it into the mold, allowing it to cure, and demolding the final piece, which may require additional finishing work.
Frequently Asked Questions (FAQs):
Q: Which mold material is best for beginners?
A: Plaster is a good choice for beginners due to its affordability and ease of use. However, it is less flexible and can be prone to cracking. Silicone offers greater flexibility and durability but is more expensive.
Q: How do I prevent air bubbles in my casting?
A: Mix your casting material slowly and carefully to avoid creating air bubbles. Tap gently on the mold sides to release any trapped air. You can also use a vacuum pump to remove air bubbles.
Q: What are some alternative casting materials I can use?
A: Besides slip clay, resin, and liquid plastic, you can explore other options like metal casting materials, concrete, or even chocolate for a unique artistic twist.
Additional Resources:
-
Books:
- “Mold Making for Ceramics” by Peter Lane
- “The Complete Book of Polymer Clay” by Lisa Pavelka
-
Online tutorials and courses:
- Skillshare: “Mold Making for Beginners” by Liz Filmer
- Udemy: “Mastering Clay Casting” by Sarah Baldwin
-
YouTube channels:
- The Pottery Whisperer
- Mold Making with Mr. Clay
Conclusion:
Mold making for clay casting unlocks a world of possibilities for artists. By embracing this captivating technique, you can share your artistic vision with a wider audience, explore exciting commercial opportunities, and push the boundaries of your creative expression. Remember, the journey of artistic growth is a continuous one. Embrace the challenges, celebrate your successes, and never stop exploring the endless possibilities of mold making and clay casting.
This concludes our exploration of mold making for clay casting. I hope this information has been informative and inspiring. Please feel free to ask any further questions you may have and keep exploring the fascinating world of artistic creation.
1 thought on “Creating Molds For Clay Casting”