Table Of Contents
- 1 Session 1: Unveiling the World of Sculpting with Epoxy Clay
- 1.1 What is Epoxy Clay?
- 1.2 A Spectrum of Possibilities:
- 1.3 Beyond Colors:
- 1.4 Unleashing Creativity:
- 1.5 Session 2: Deciphering the Tools and Techniques of Epoxy Clay Sculpting
- 1.6 Essential Tools:
- 1.7 Fundamental Techniques:
- 1.8 Project Ideas to Spark Your Creativity:
- 1.9 Session 3: Embarking on Your Creative Journey: A Sculpting Project with Epoxy Clay
- 1.10 Project: The Sculptural Bowl
- 1.11 Materials:
- 1.12 Instructions:
- 1.13 Beyond the Basics:
- 1.14 Session 4: Sculpting with Confidence: Addressing Your Epoxy Clay FAQs
- 1.15 Q: What is the difference between epoxy clay and air-dry clay?
- 1.16 Q: How long does epoxy clay take to cure?
- 1.17 Q: Can I mix different colors of epoxy clay?
- 1.18 Q: How do I prevent epoxy clay from sticking to my tools?
- 1.19 Q: Can I bake epoxy clay?
- 1.20 Q: Can I paint my epoxy clay sculptures?
- 1.21 Q: How do I store unused epoxy clay?
- 1.22 Additional Resources:
Session 1: Unveiling the World of Sculpting with Epoxy Clay
Sculpting with epoxy clay opens a door to a captivating realm of artistic creation, accessible to individuals of all skill levels. This remarkable material, with its unique properties and diverse applications, empowers you to bring your imagination to life in tangible, lasting form.
In this introductory session, we’ll explore the captivating world of epoxy clay, delving into its characteristics, advantages, and diverse applications.
What is Epoxy Clay?
Epoxy clay, unlike air-dry clay that hardens by exposure to air, remains soft and pliable until cured through a chemical reaction triggered by mixing a resin and a hardener. This unique property offers greater flexibility during sculpting, allowing you to make adjustments and refine your creations as you go. Additionally, its lightweight nature makes finished sculptures surprisingly manageable and easy to display.
A Spectrum of Possibilities:
Epoxy clay comes in a vibrant spectrum of colors, ranging from classic hues to metallic and pearlescent shades, catering to your creative vision and desired aesthetic. This vast palette empowers you to bring your artistic vision to life with precision and detail.
Beyond Colors:
The versatility of epoxy clay extends beyond its mesmerizing colors. You can mix different colors to create custom shades and gradients, adding depth and dimension to your sculptures. Additionally, numerous techniques like cane making, mica shifting, and texturing offer endless opportunities for creating intricate patterns, mesmerizing effects, and unique textures.
Unleashing Creativity:
Epoxy clay readily adapts to various sculpting techniques, allowing you to explore and discover your preferred style. Whether you’re drawn to the simplicity of pinch pottery, the intricate details achieved through coil building, or the expressive freedom of modeling, epoxy clay caters to your artistic inclinations.
In the next session, we’ll delve deeper into the world of sculpting with epoxy clay, exploring essential tools, techniques, and basic project ideas to ignite your creative journey.

Session 2: Deciphering the Tools and Techniques of Epoxy Clay Sculpting
With the captivating world of epoxy clay unveiled, it’s time to unlock the secrets of sculpting with this versatile material. In this session, we’ll delve into the essential tools and techniques you’ll need to embark on your creative journey.
Essential Tools:
- Sculpting tools: A basic set of sculpting tools is vital for shaping, smoothing, and detailing your clay. Invest in a set of metal sculpting tools, including spatulas, loop tools, and sculpting knives.
- Mixing tools: You’ll need mixing containers and spatulas to effectively mix the resin and hardener components of the epoxy clay. Disposable gloves are also essential to protect your hands during the mixing process.
- Rolling pins and texture sheets: These tools help create flat sheets of clay for further manipulation and add intricate textures to your sculptures.
- Work surface: A smooth, non-stick surface like a glass or silicone mat is crucial for sculpting without your clay adhering to the surface.
Fundamental Techniques:
- Mixing: Carefully mix the resin and hardener in the correct proportions according to the manufacturer’s instructions. Thorough mixing ensures a proper cure and prevents an uneven finish.
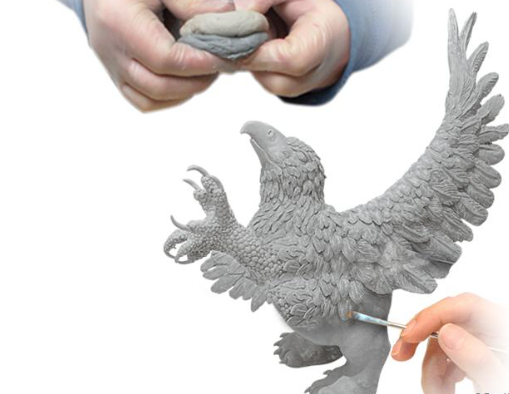
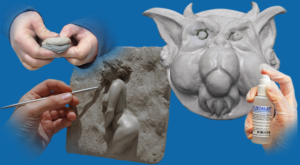
- Shaping: Use your sculpting tools and fingers to shape the clay according to your desired form. The soft and pliable nature of epoxy clay allows for smooth surfaces and intricate details.
- Smoothing: Once you’ve achieved the desired shape, use your fingers or a wet sculpting tool to smooth out any rough edges and achieve a polished finish.
- Texturing: Experiment with different tools and techniques to add textures and patterns to your sculptures. This can be done using brushes, combs, texture sheets, or even found objects.
- Joining pieces: Epoxy clay readily adheres to itself, allowing you to easily join different pieces together to create larger and more complex sculptures.
- Curing: Allow the finished sculpture to cure for the recommended time, typically 24-48 hours, before handling or applying further embellishments.
Project Ideas to Spark Your Creativity:
- Pinch pots: This simple technique is a perfect starting point for beginners. Use your fingers to pinch and shape the clay into small bowls or containers.
- Coil building: This technique involves creating long, thin coils of clay and joining them together to build your sculpture. It’s ideal for creating figures, animals, and various objects.
- Sculptural jewelry: Create unique and personalized pendants, earrings, or necklaces using epoxy clay. Add beads, charms, or other embellishments for added flair.
- Miniature figurines: Bring your favorite characters or creatures to life by sculpting miniature figurines with epoxy clay.
- Textured tiles: Create decorative tiles with unique textures and patterns using various tools and techniques. These can be used for coasters, wall art, or other decorative purposes.
With the knowledge of essential tools and techniques, the world of sculpting with epoxy clay awaits your exploration. In the next session, we’ll embark on a creative journey, exploring step-by-step instructions for a basic project to help you put your newly acquired knowledge into practice.
Session 3: Embarking on Your Creative Journey: A Sculpting Project with Epoxy Clay
With the tools and techniques of epoxy clay sculpting at your fingertips, it’s time to embark on your creative adventure. This session will guide you through a basic project, allowing you to put your newfound knowledge into practice and bring your artistic vision to life.
Project: The Sculptural Bowl
This project is perfect for beginners as it involves basic shaping techniques and allows you to experiment with texture and color. Let’s dive into the step-by-step process:
Materials:
- Epoxy clay in your desired color(s)
- Mixing tools and containers
- Sculpting tools (spatulas, loop tools, sculpting knives)
- Rolling pin or flat surface
- Texture sheet (optional)
- Wet sponge or brush
Instructions:
- Mix the epoxy clay: Carefully follow the manufacturer’s instructions to mix the resin and hardener components. Ensure thorough mixing for a proper cure and even finish.
- Shape the base: Take a portion of the mixed clay and roll it out on a flat surface or using a rolling pin to create a flat sheet. This will be the base of your bowl.
- Form the walls: Using your fingers or a sculpting tool, gently lift the edges of the clay sheet to create the walls of your bowl. Pinch and shape the walls, ensuring they have a smooth and even thickness.
- Refine the shape: Use your sculpting tools to further refine the shape and size of your bowl. Smooth out any rough edges and create a clean and polished finish.
- Adding texture: If desired, use a textured sheet to imprint patterns onto the surface of your bowl. Alternatively, use your tools or found objects to create unique textures.
- Joining the edges: If you want a deeper bowl, create additional clay coils and join them to the existing walls using gentle pressure. Ensure the seams are smooth and secure.
- Finishing touches: Once you’re satisfied with the shape and texture, use a wet sponge or brush to smooth out any remaining imperfections. You can also add embellishments like beads or other decorative elements at this stage.
- Curing: Allow your finished bowl to cure for the recommended time, typically 24-48 hours. Once cured, you can admire your creation and showcase your artistic talents!
Beyond the Basics:
This project is just a starting point to ignite your creative journey. As you experiment and gain experience, you can venture into more complex projects, exploring different techniques, incorporating various materials, and adding intricate details to your sculptures.
Remember, creativity thrives on exploration and experimentation. Unleash your inner artist, embrace the learning process, and enjoy the journey of transforming your imagination into tangible and lasting creations with the magic of epoxy clay.
In the next session, we’ll wrap up our exploration of epoxy clay sculpting by addressing frequently asked questions to empower you on your creative journey.
Session 4: Sculpting with Confidence: Addressing Your Epoxy Clay FAQs
As you embark on your journey with epoxy clay sculpting, you might encounter some questions along the way. This session addresses frequently asked questions to empower you on your creative journey and equip you with the knowledge to confidently navigate the world of epoxy clay:
Q: What is the difference between epoxy clay and air-dry clay?
A: The main difference lies in their curing mechanism. Epoxy clay cures through a chemical reaction, while air-dry clay hardens by exposure to air. This means epoxy clay offers longer working times and allows for adjustments during sculpting. Additionally, epoxy clay is typically more durable and waterproof compared to air-dry clay.
Q: How long does epoxy clay take to cure?
A: Curing time varies depending on the brand and the thickness of your sculpture. In general, most epoxy clay cures within 24-48 hours. However, it’s always recommended to follow the manufacturer’s specific instructions for optimal results.
Q: Can I mix different colors of epoxy clay?
A: Absolutely! Mixing different colors is a fantastic way to create custom shades and add depth and dimension to your sculptures. Ensure you thoroughly blend the colors to achieve a uniform and vibrant hue.
Q: How do I prevent epoxy clay from sticking to my tools?
A: Dipping your tools in water or using a silicone barrier spray can help prevent the clay from adhering to them. Additionally, cleaning your tools frequently will ensure a smooth and seamless sculpting experience.
Q: Can I bake epoxy clay?
A: No, epoxy clay should not be baked. Baking can cause the clay to burn and release harmful fumes. It’s important to follow the recommended curing process for optimal results.
Q: Can I paint my epoxy clay sculptures?
A: Yes, you can paint your cured epoxy clay sculptures with acrylic paints or other suitable mediums. Apply a primer before painting to ensure the paint adheres properly.
Q: How do I store unused epoxy clay?
A: Store unused epoxy clay in an airtight container in a cool, dry place. This will prevent it from drying out and hardening prematurely.
Remember, the journey of sculpting with epoxy clay is a continuous learning process. Be patient, embrace challenges as learning opportunities, and most importantly, have fun! With practice and dedication, you’ll be shaping your imagination into stunning creations and unlocking your full potential as an artist.
Additional Resources:
- Online tutorials and demonstrations showcasing various epoxy clay sculpting techniques.
- Books and magazines dedicated to polymer clay and epoxy clay sculpting.
- Online forums and communities where you can connect with other artists, share your creations, and receive feedback.
By venturing into the world of epoxy clay sculpting, you’re embarking on an exciting creative adventure. Embrace the process, explore your artistic vision, and discover the joy of transforming a simple lump of clay into a unique and personalized masterpiece.