Table Of Contents
- 1 Unveiling the Earth’s Creativity: An Introduction to Sculpting with Terracotta Clay
- 1.1 Exploring a World of Creative Possibilities:
- 1.2 Session 2: Transforming Earth into Art: Techniques and Tools for Terracotta Sculpting
- 1.3 Essential Techniques:
- 1.4 Tools for the Sculptor’s Arsenal:
- 1.5 Beyond the Basics:
- 1.6 Session 3: Shaping Imagination into Reality: A Hands-On Guide to Terracotta Sculpting
- 1.7 Getting Started:
- 1.8 Let’s Create a Pinch Pot:
- 1.9 Adding Details and Embellishments:
- 1.10 Drying and Firing:
- 1.11 Unveiling Your Masterpiece:
- 1.12 Session 4: Celebrating the Journey: Conclusion and FAQs
- 1.13 Key Takeaways:
- 1.14 Frequently Asked Questions:
- 1.15 Q: Do I need any prior experience to start sculpting with terracotta clay?
- 1.16 Q: Where can I find terracotta clay and sculpting tools?
- 1.17 Q: How do I ensure my terracotta sculptures are durable?
- 1.18 Q: Can I paint my terracotta sculptures?
- 1.19 Q: How can I share my terracotta creations with the world?
Unveiling the Earth’s Creativity: An Introduction to Sculpting with Terracotta Clay
Terracotta clay, with its rich history and inviting texture, offers a captivating and accessible medium for creative expression. Whether you’re a seasoned sculptor or a curious beginner, this session delves into the world of terracotta sculpting, providing an alluring glimpse into its potential and possibilities.
What is Terracotta Clay?
Terracotta clay, meaning “baked earth” in Italian, is a naturally occurring type of clay high in iron oxides, lending it a warm, reddish-brown hue. Its natural coarseness makes it incredibly forgiving and easy to manipulate, perfect for both intricate details and bold, expressive forms.
Why Choose Terracotta for Sculpting?
This earthy material holds several advantages, making it a compelling choice for aspiring sculptors:
- Accessibility: Terracotta clay is readily available at most art supply stores and often more affordable than other sculpting mediums.
- Versatility: It readily adapts to various sculpting techniques, from pinch pottery and coil building to slab construction and modeling.
- Durability: When fired at high temperatures, terracotta sculptures become remarkably strong and can endure for centuries.
- Sustainability: As a natural material, terracotta clay is a sustainable choice that minimizes environmental impact.
Exploring a World of Creative Possibilities:
Sculpting with terracotta clay opens doors to a boundless realm of artistic expression. Here are just a few ways to unleash your creativity:
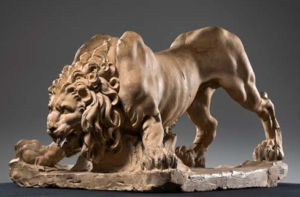
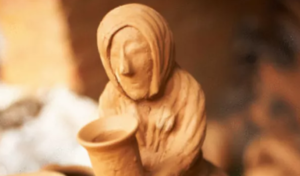
- Figurative Sculptures: Breathe life into clay, crafting captivating figures of humans, animals, or mythical creatures.
- Functional Objects: Create beautiful and functional pieces like vases, mugs, bowls, and even decorative tiles.
- Abstract Forms: Explore the freedom of abstract expression, shaping the clay into unique and evocative forms.
- Relief Sculptures: Add dimension to surfaces by carving patterns, textures, and figures onto flat slabs of clay.
In the next session, we’ll delve deeper into the process of sculpting with terracotta clay, exploring various techniques and tools to guide your creative journey.
Session 2: Transforming Earth into Art: Techniques and Tools for Terracotta Sculpting
Having explored the fascinating world of terracotta clay, let’s delve into the fundamental techniques and tools that empower you to transform this earthy material into stunning sculptures.
Essential Techniques:
- Pinch Potting: This simple yet versatile technique involves shaping the clay with your fingers, creating hollow forms like mugs, bowls, and vases.
- Coil Building: By joining long, rolled-out coils of clay, you can build sculptures of any size and complexity, adding intricate details and unique textures.
- Slab Construction: This method involves cutting and shaping flat slabs of clay to create a variety of forms, ideal for creating structures, wall hangings, and decorative panels.
- Modeling: Using sculpting tools like spatulas, brushes, and knives, you can refine and detail your clay creations, adding expression and individuality to your sculptures.
Tools for the Sculptor’s Arsenal:
- Rolling Pin: Flattens and smooths clay, preparing it for various techniques like coil building and slab construction.
- Sculpting Knives and Tools: A variety of knives and tools allow you to carve, cut, and shape the clay, creating precise details and textures.
- Ribs and Sponges: Smooth and refine the surface of your sculptures, eliminating unwanted fingerprints and marks.
- Texturing Tools: These tools imprint patterns and textures onto the clay, adding visual interest and dimension to your sculptures.
- Brushes: Used for applying slip (liquid clay) to join clay pieces and create smooth surfaces.
- Water Container and Sponge: Keeping the clay hydrated is crucial; use water and a sponge to maintain its malleability while sculpting.
Beyond the Basics:
While these techniques and tools form the foundation of terracotta sculpting, the journey of artistic exploration extends far beyond. Experimenting with different textures, surface finishes, and glazes allows you to personalize your sculptures and add your unique artistic voice.
In the next session, we’ll embark on a hands-on exploration of the sculpting process, guiding you through creating your first terracotta masterpiece.
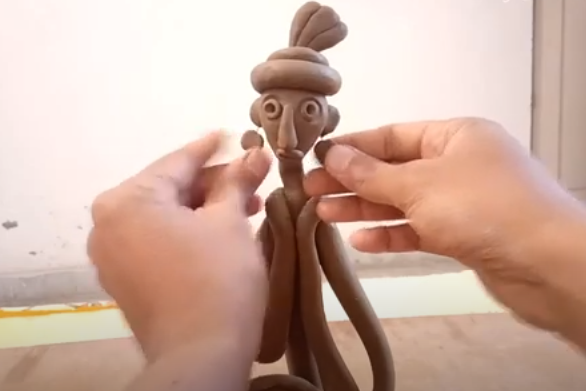
Session 3: Shaping Imagination into Reality: A Hands-On Guide to Terracotta Sculpting
Now, with your knowledge of terracotta clay and its captivating potential, it’s time to embark on a hands-on adventure of bringing your artistic vision to life. This session will guide you through the process of creating your first terracotta masterpiece, step-by-step.
Getting Started:
- Gather your materials: You’ll need terracotta clay, a rolling pin, sculpting tools (knife, sponge, ribs), water container, and a smooth work surface.
- Prepare the clay: Knead the clay with your hands until it becomes soft and pliable, ensuring there are no air bubbles.
Let’s Create a Pinch Pot:
- Form a ball: Roll the clay into a ball, ensuring its size and shape reflect your desired final pot size.
- Start pinching: Use your thumb and fingers to gently pinch the center of the ball, creating a hollow space.
- Gradually thin the walls: As you pinch further, gradually thin the walls of the pot, maintaining an even thickness throughout.
- Shape the rim: Use your fingers to shape the rim of the pot into your desired form, whether rounded, flared, or textured.
- Smooth and refine: Use a wet sponge to smooth the surface of the pot and eliminate any fingerprints or unevenness.
Adding Details and Embellishments:
- Score and slip: If you wish to add attachments or decorations, score both surfaces where they will meet with a knife and apply a thin layer of slip (liquid clay) to ensure a strong bond.
- Carving and texturing: Once the clay is firm enough, use sculpting tools to carve designs, patterns, or textures onto your pot.
- Glazing: After your pot has dried completely, you can apply glazes for a vibrant finish and additional protection.
Drying and Firing:
- Allow your creation to air-dry completely before firing it in a kiln. The drying time will depend on the size and thickness of your pot.
- Firing temperatures for terracotta clay generally range between 900°C and 1,000°C. Consult your kiln manual or a ceramics studio for specific instructions.
Unveiling Your Masterpiece:
Once your creation emerges from the kiln, you’ll witness the transformation of earthy clay into a beautiful and enduring work of art. Take pride in your accomplishment and celebrate your creative journey.
Remember, this is just the beginning of your sculpting adventures. As you explore different techniques, experiment with materials, and refine your skills, you’ll discover a boundless world of artistic possibilities within the realm of terracotta clay.
Session 4: Celebrating the Journey: Conclusion and FAQs
As we conclude our exploration of the captivating world of terracotta sculpting, let’s take a moment to recap the key takeaways and address frequently asked questions to empower you on your creative journey.
Key Takeaways:
- Terracotta clay offers a versatile, accessible, and sustainable medium for sculpting, ideal for individuals of all skill levels.
- Essential techniques like pinch potting, coil building, slab construction, and modeling offer endless possibilities for creating diverse and expressive sculptures.
- Sculpting tools like rolling pins, knives, sponges, ribs, and texturing tools enable precise shaping, detailing, and textural effects.
- Experimenting with glazes, surface finishes, and firing temperatures allows you to personalize your creations and add your unique artistic voice.
- Terracotta sculpting fosters creativity, mindfulness, skill development, and a connection to the natural world.
Frequently Asked Questions:
Q: Do I need any prior experience to start sculpting with terracotta clay?
A: No prior experience is necessary! This beginner-friendly medium allows you to learn and experiment at your own pace, while resources and workshops are available to guide your progress.
Q: Where can I find terracotta clay and sculpting tools?
A: Most art supply stores offer a variety of terracotta clays and sculpting tools. Additionally, online retailers and ceramic studios provide a wider selection and expert advice.
Q: How do I ensure my terracotta sculptures are durable?
A: Proper drying and firing are crucial for durability. Allow sufficient air-drying time and ensure your kiln reaches the recommended firing temperature for terracotta clay (generally between 900°C and 1,000°C).
Q: Can I paint my terracotta sculptures?
A: Yes, you can! After your sculptures have been fired and cooled, you can paint them with acrylic paints or other suitable mediums. Remember to seal your painted pieces for added protection.
A: Participate in art shows, online communities, or local craft fairs to showcase your work and connect with other artists. Sharing your creations provides valuable feedback and inspiration, fostering your artistic growth.
Embark on your terracotta sculpting journey with an open mind, a playful spirit, and a willingness to experiment. Embrace the transformative power of this earthy material, and discover the joy of creating unique and lasting art pieces.
Remember, the journey is just as important as the destination. Enjoy the process, learn from your experiences, and don’t be afraid to push boundaries and embrace the unexpected. With dedication and passion, you’ll unlock the boundless creative potential that lies within the world of terracotta clay.
1 thought on “Sculpting With Terracotta Clay”