Table Of Contents
- 1 Bridging the Dimensions: Transferring 2D Images to 3D Clay Sculptures
- 1.1 From Flat to Form: Unveiling the Process
- 1.2 The Meaning of Bridging the Dimensions: Exploring the Essence of Image-to-Sculpture Transfer
- 1.3 Preserving Memories in a Tangible Form:
- 1.4 Fueling Creativity and Artistic Interpretation:
- 1.5 Pushing Artistic Boundaries and Challenging Perception:
- 1.6 Bringing Images to Life: The Practical Guide to Transferring 2D Images to 3D Clay Sculptures
- 1.7 Gathering Your Toolkit:
- 1.8 Building the Foundation:
- 1.9 Sculpting with Precision:
- 1.10 Bridging the Dimensions: Conclusions, FAQs, and Resources for Image-to-Sculpture Transfer
- 1.11 Key Takeaways:
- 1.12 Frequently Asked Questions (FAQs):
- 1.13 Q: What types of 2D images are best suited for this technique?
- 1.14 Q: What are some common challenges faced by beginners?
- 1.15 Q: Are there any software tools that can assist with the image-to-sculpture transfer process?
- 1.16 Additional Resources:
- 1.17 Books:
- 1.18 Online tutorials and courses:
- 1.19 YouTube channels:
- 1.20 Conclusion:
Bridging the Dimensions: Transferring 2D Images to 3D Clay Sculptures
Have you ever looked at a cherished photograph or a captivating drawing and wished you could experience it in a new dimension? The art of transferring 2D images to 3D clay sculptures offers you this unique opportunity. This fascinating technique allows you to transform flat images into tangible, three-dimensional representations, breathing life into memories and adding depth to your favorite artwork.
In this introductory session, we’ll delve into the captivating world of image-to-sculpture transfer, exploring the process, benefits, and challenges involved in this artistic journey. Whether you’re a seasoned sculptor or a curious newcomer, this session will equip you with the essential knowledge to embark on your own creative exploration of bridging the dimensions.
From Flat to Form: Unveiling the Process
The process of transferring 2D images to 3D clay sculptures involves a series of meticulous steps, each requiring a keen eye, steady hand, and a touch of artistic interpretation. Here’s a glimpse into the magic behind this transformation:
- Image Selection: The first crucial step is choosing the perfect 2D image. Look for high-resolution images with good contrast, allowing for clear transfer of details to the clay.
- Grid System: A grid system acts as your map, guiding you in accurately translating proportions and details from the image to the 3D form.
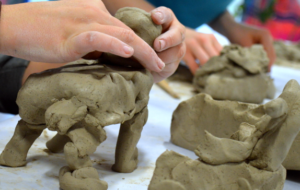
- Building the Foundation: Using sculpting techniques like coiling, slab building, and armature construction, you’ll gradually give life to the basic form of the image in clay.
- Sculpting with Precision: With the foundation laid, it’s time to meticulously add details like facial features, clothing folds, and other elements, ensuring they faithfully reflect the 2D image.
- Refining and Finishing: The final step involves smoothing imperfections, correcting any discrepancies, and adding finishing touches to enhance the sculpture’s visual appeal and realism.
In the next session, we’ll explore the rewarding benefits of this artistic practice, highlighting why transferring 2D images to 3D clay sculptures is more than just a technical exercise but a path to preserving memories, fostering creativity, and pushing artistic boundaries.

The Meaning of Bridging the Dimensions: Exploring the Essence of Image-to-Sculpture Transfer
In our previous session, we embarked on a journey to understand the process of transferring 2D images to 3D clay sculptures. Now, we delve deeper to explore the essence of this artistic practice, uncovering the profound meaning and significance it holds beyond the technical aspects.
Preserving Memories in a Tangible Form:
Photographs and drawings capture fleeting moments in time, but they remain confined to the realm of two dimensions. Transferring these cherished memories to 3D sculptures allows you to literally hold them in your hands, adding a new layer of tangibility and emotional connection. A child’s first smile, a beloved pet’s portrait, or a treasured family photo – these memories transcend the limitations of a flat image, becoming three-dimensional objects that can be interacted with and cherished for years to come.
Fueling Creativity and Artistic Interpretation:
While faithfully recreating the essence of the 2D image is vital, transferring it to 3D clay offers artists a unique opportunity to inject their own creative spark. The sculpting process allows for subtle adjustments, personalized details, and even complete reinterpretations of the original image. This creative freedom empowers artists to personalize their artwork, infuse it with their own vision, and create sculptures that are not mere copies but unique artistic expressions.
Pushing Artistic Boundaries and Challenging Perception:
The act of bridging the dimensions between 2D and 3D challenges the way we perceive and interact with art. It pushes the boundaries of traditional painting and drawing, offering a new dimension for artistic exploration. Sculptors can experiment with different materials, techniques, and styles, blurring the lines between traditional mediums and creating innovative art forms that redefine the possibilities of artistic expression.
Beyond the technical skills and artistic freedom, transferring 2D images to 3D clay sculptures fosters a deeper connection with the subject matter. It allows artists to engage with their chosen image on a more profound level, understand its intricacies, and translate its essence into a tangible form. This journey of artistic translation becomes a form of appreciation, offering a new perspective on the original image and enriching its meaning.
In the next session, we will dive deeper into the fascinating journey of image-to-sculpture transfer, delving into the practical aspects of the process and providing you with the knowledge and tools to embark on this creative adventure.

Bringing Images to Life: The Practical Guide to Transferring 2D Images to 3D Clay Sculptures
Having explored the captivating essence of image-to-sculpture transfer, we now embark on the practical journey of translating your chosen 2D image into a stunning 3D clay masterpiece. This session equips you with the necessary knowledge and techniques to navigate this artistic process, from choosing the right materials to adding the final touches that bring your image to life.
Gathering Your Toolkit:
- Choosing the Right Clay: Different types of clay offer varying degrees of plasticity, drying times, and color options. Select a clay type that aligns with your desired artistic effect and personal sculpting preferences.
- Sculpting Tools: Equip yourself with essential tools like sculpting knives, spatulas, brushes, and texture tools to manipulate the clay and achieve precise details.
- Reference Materials: Keep your chosen 2D image readily available for reference throughout the sculpting process. Having multiple photographs or sketches from different angles can provide valuable insights.
- Grid System: Prepare a grid system on both your image and sculpting surface. This grid acts as a roadmap for accurately translating proportions and details from the 2D to the 3D form.
Building the Foundation:
- Start with the Basic Form: Begin by building the basic three-dimensional shape of your image using simple techniques like coiling or slab-building. Focus on capturing the overall proportions and ensuring the armature provides adequate support for the final sculpture.
- Marking Key Points: Transfer key anatomical landmarks and important details from your grid system onto the clay surface. This serves as a guide for accurately positioning facial features, limbs, and other elements.
- Adding Dimensionality: Gradually refine the form, adding depth and dimension to various features. Use sculpting tools to create folds, curves, and textures, bringing your image to life in three-dimensional space.
Sculpting with Precision:
- Capturing Details: Once the basic form is established, meticulously sculpt the finer details. Focus on facial features, hair, clothing elements, and any other distinctive elements that define the essence of your image.
- Refining the Surface: Smoothen the surface of your sculpture, paying close attention to areas where different pieces of clay meet. Use various tools and techniques to achieve a seamless and aesthetically pleasing finish.
- Adding Finishing Touches: Apply finishing touches like texture accents, color details, and glaze to further enhance the visual appeal and realism of your sculpture.
Throughout the process, remember to continuously reference your 2D image and adjust your sculpting accordingly. Patience, precision, and careful observation are key to achieving a successful image-to-sculpture translation.
In the final session, we’ll address frequently asked questions and provide you with additional resources to further your exploration of this captivating artistic practice.
Bridging the Dimensions: Conclusions, FAQs, and Resources for Image-to-Sculpture Transfer
Having journeyed through the fascinating process of transferring 2D images to 3D clay sculptures, we now reach the culmination of our exploration. This final session serves to consolidate key takeaways, address frequently asked questions, and provide valuable resources to support your continued artistic growth in this captivating art form.
Key Takeaways:
- The process of transferring 2D images to 3D clay sculptures requires meticulous planning, careful observation, and a combination of technical skills and artistic vision.
- This technique offers a unique way to preserve memories in a tangible form, fostering a deeper connection with the subject matter and enriching its meaning.
- Image-to-sculpture transfer empowers artists to push creative boundaries, inject their own interpretations, and create innovative art forms that redefine the possibilities of artistic expression.
Frequently Asked Questions (FAQs):
Q: What types of 2D images are best suited for this technique?
A: Images with good contrast, clear details, and defined lines are ideal for translating to 3D clay sculptures. Portraits, landscapes, and still life images are popular choices.
Q: What are some common challenges faced by beginners?
A: Maintaining accurate proportions, capturing subtle details, and achieving a smooth surface can be challenging. Patience, practice, and continuous reference to the 2D image are essential for overcoming these hurdles.
Q: Are there any software tools that can assist with the image-to-sculpture transfer process?
A: Yes, several 3D modeling programs like ZBrush and Maya allow you to import 2D images and use them as reference points for creating 3D models. These models can then be used as a guide for the sculpting process.
Additional Resources:
-
Books:
- “Sculpting from Photographs: Transforming Images into 3D Art” by Barbara Thomson
- “The Complete Guide to Clay Sculpting” by Matt Fusel
-
Online tutorials and courses:
- Skills are: “How to Make a 2D Image into a 3D Sculpt” by Ashley Hills
- Udemy: “Mastering Portrait Sculpture from 2D Images” by Steven Pearce
-
YouTube channels:
- The Virtual Instructor
- Capful Creations
Conclusion:
Transferring 2D images to 3D clay sculptures is an enriching and rewarding artistic practice. By embracing the process, exploring its possibilities, and leveraging available resources, you can create captivating sculptures that bridge the dimensions, breathe life into memories, and push the boundaries of your artistic expression. Remember, the journey of artistic growth is a continuous one. Embrace the challenges, celebrate your successes, and never stop exploring the endless possibilities of the world of image-to-sculpture transfer.

1 thought on “Transferring 2D Images To 3D Clay Sculptures”