Table Of Contents
- 1 Will Clay Stick to Metal? Unveiling the Mystery
- 2
- 2.1 Bridging the Gap: Practical Techniques for Bonding Clay to Metal
- 2.2 1. Choosing the Right Tools:
- 2.3 2. Applying the Clay:
- 2.4 3. Drying and Finishing Touches:
- 2.5 4. Unleashing Your Creativity:
- 2.6 A Lasting Connection: Conclusion and Frequently Asked Questions
- 2.7 Key Takeaways:
- 2.8 Frequently Asked Questions (FAQs):
- 2.9 Q: What type of metal is best for attaching clay to?
- 2.10 Q: How long does it take for clay to dry on metal?
- 2.11 Q: What can I do if the clay cracks after drying?
- 2.12 Q: Where can I find more information and inspiration for clay and metal projects?
- 2.13 Conclusion:
Will Clay Stick to Metal? Unveiling the Mystery
The question of whether clay will stick to metal sparks curiosity in every artist and crafter who explores the diverse world of mixed-media art. The answer, however, is not a simple yes or no. The bond between these two seemingly incompatible materials hinges on a delicate interplay of factors, encompassing the specific types of clay and metal involved, surface preparation techniques, and the chosen application method.
In this first session, we embark on a captivating journey to unravel the mystery of clay and metal adhesion. We’ll delve into the complexities of this interaction, examining the properties of various clay and metal types and their influence on the bond’s strength. Additionally, we’ll uncover the key considerations for preparing both surfaces for successful adhesion.
Beyond the Surface: Unveiling the Meaning of Clay and Metal Adhesion
Having ignited the spark of curiosity, we now delve deeper into the meaning of clay and metal adhesion. Understanding the fundamental principles governing this interaction lays the foundation for a successful artistic pursuit.
Clay Types and Their Characteristics:
- Air-dry Clay: Possessing inherent stickiness, air-dry clay readily adheres to rougher metal surfaces like aluminum or sandpapered metal. However, its strength may be insufficient for smooth metals or heavier applications.
- Polymer Clay: This versatile material requires baking to harden and lacks the natural stickiness of air-dry clay. Achieving a strong bond with metal necessitates adhesives like epoxy or liquid polymer clay.
- Earthenware and Stoneware: These clays exhibit minimal natural adhesion and demand additional support, such as adhesives, embedding techniques, or direct firing onto the metal surface, for a secure bond.
Metal Types and Their Impact:
- Aluminum: With its naturally textured surface, aluminum offers a good foundation for the adhesion of air-dry clay. Enhancing the texture further through sanding can further strengthen the bond.
- Steel: Smooth steel surfaces require an adhesive like epoxy to achieve a strong bond with clay.
- Copper: Prone to oxidation, copper needs specialized primers to ensure optimal adhesion with clay.
Surface Preparation: A Crucial Step:
Before embarking on the artistic journey, proper surface preparation is paramount. Both the metal and the clay need to be:
- Clean: Free from dust, oil, and any contaminants that may hinder adhesion.
- Roughened (optional): Sanding the metal surface, particularly for smooth metals, creates a textured surface for the clay to grip onto.
- Primed (optional): For specific metal types like copper, specialized primers can enhance the adhesion of clay.
By understanding these fundamental principles, we unlock the doors to a creative realm where clay and metal intertwine in artistic expression. In the next session, we’ll delve deeper into the practical techniques that bring this fascinating interaction to life.
Bridging the Gap: Practical Techniques for Bonding Clay to Metal
Having equipped ourselves with the fundamental knowledge of clay and metal adhesion, we now venture into the practical realm. This session will explore specific techniques and methods that enable us to confidently bridge the gap between these two distinct materials.
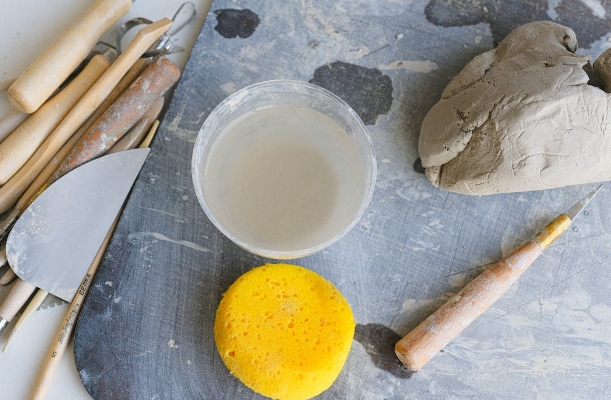
1. Choosing the Right Tools:
- Adhesives: For a secure bond, selecting the appropriate adhesive is crucial. Epoxy glue offers superior strength and durability, while craft glue is suitable for lighter clay applications. Liquid polymer clay provides a versatile solution, acting as both a sculpting medium and an adhesive. Specialized clay-to-metal adhesives are also available for optimal results.
- Embedding Tools: For heavier clay objects or enhancing the bond’s strength, embedding techniques like carving grooves or drilling holes in the metal surface and inserting wire dipped in adhesive come into play.
- Priming Tools: For specific metal types like copper, applying a specialized primer using a brush or spray gun ensures optimal adhesion with clay.
2. Applying the Clay:
- Direct Application: For air-dry clay on rougher metals, directly applying and firmly pressing the clay onto the surface creates a good initial bond.
- Adhesive Application: For polymer clay or smoother metal surfaces, applying a thin layer of the chosen adhesive to both the clay and the metal surface before joining them ensures a strong and lasting bond.
- Embedding Techniques: Carving grooves or drilling holes in the metal and inserting wire dipped in adhesive followed by applying the clay provides additional support and reinforcement for heavier clay objects.
- Multiple Layers: Applying multiple thin layers of clay, allowing each layer to dry thoroughly before adding the next, strengthens the overall structure and reduces the risk of cracking, especially for heavier applications.
3. Drying and Finishing Touches:
- Drying Time: Adhering to the specific drying instructions for your chosen clay and adhesive is crucial for achieving optimal results. Air-dry clay typically takes 24-48 hours, while polymer clay requires baking in an oven.
- Sealing: Applying a sealant, such as acrylic varnish, protects your artwork from dust, moisture, and fading, ensuring its longevity and vibrant colors.
4. Unleashing Your Creativity:
By mastering these practical techniques, you are empowered to unleash your artistic creativity and explore the boundless possibilities of clay and metal. Experiment with different clay types, textures, colors, and embellishments to create unique sculptures, jewelry, mixed-media artwork, and more.
Remember, the key to success lies in understanding the factors influencing adhesion, carefully selecting the appropriate tools and materials, and meticulously applying the chosen techniques. With dedication and a touch of artistic flair, you can transform the seemingly disparate materials of clay and metal into captivating and enduring works of art.
A Lasting Connection: Conclusion and Frequently Asked Questions
As we conclude our exploration of clay adhesion to metal, we reflect on the key takeaways and address frequently asked questions to solidify your understanding and empower your future artistic endeavors.
Key Takeaways:
- Clay can adhere to metal, but the strength of the bond depends on the specific types of clay and metal involved, surface preparation, chosen adhesive, and application technique.
- Air-dry clay readily adheres to rougher metals like aluminum, while polymer clay requires adhesives like epoxy or liquid polymer clay. Earthenware and stoneware demand additional support like embedding techniques or direct firing.
- Surface preparation, including cleaning and roughening the metal and using specialized primers for certain metals like copper, plays a crucial role in ensuring a strong bond.
- Various adhesives cater to different needs, with epoxy offering superior strength, craft glue suitable for lighter applications, and liquid polymer clay serving as both a sculpting medium and an adhesive.
- Embedding techniques like carving grooves or drilling holes provide additional support and reinforcement for heavier clay objects.
- Applying multiple thin layers of clay strengthens the overall structure and reduces cracking.
- Sealing your artwork protects it from dust, moisture, and fading, ensuring its longevity.
Frequently Asked Questions (FAQs):
Q: What type of metal is best for attaching clay to?
A: Rougher metals like aluminum offer a better initial grip for air-dry clay. Smooth metals like steel require adhesives. Copper, prone to oxidation, needs specialized primers for optimal adhesion.
Q: How long does it take for clay to dry on metal?
A: Drying time depends on the clay type, adhesive used, and layer thickness. Air-dry clay typically takes 24-48 hours, while polymer clay requires baking.
Q: What can I do if the clay cracks after drying?
A: Minor cracks can be repaired with a small amount of water and smoothed with a damp brush. For larger cracks, you may need to remove and re-attach the clay.
Q: Where can I find more information and inspiration for clay and metal projects?
A: Online resources, books, magazines, and craft stores offer tutorials, tips, and project ideas. Additionally, online communities and forums provide valuable insights and inspiration.
Conclusion:
The enduring bond between clay and metal unlocks a world of artistic possibilities. By understanding the factors influencing adhesion and mastering various techniques, you can create stunning sculptures, innovative jewelry, and mixed-media artwork that pushes the boundaries of artistic expression. Remember, experimentation, practice, and a passion for artistic exploration are the keys to unlocking the full potential of this captivating material combination.
This concludes our exploration of clay and metal adhesion. We hope this information has been informative and inspiring. Please feel free to ask any further questions you may have and keep exploring the fascinating world of clay and metal artistry.
1 thought on “Will Clay Stick To Metal”